AutoCAD 2012: New Content Explorer
AutoCAD 2012: Video - New Content Explorer
During the presentation a really good question came up, and I thought it would be a great post to share.
How do I add a network folder as a watched folder in the new Content Explorer?
Adding local folders to the Content Explorer is easy, you simply click Add Watched Folder, browse to a folder on your computer, and AutoCAD automatically indexes the contents. However, adding a folder from a network location requires a couple more steps.
First, you need to install the Autodesk Content Service on the network computer that will be sharing the network folder. Remember, only shared folders can be accessed through the Content Service. To do this, you’ll need to launch the installation DVD or download. On the first setup screen select Install Tools and Utilities. Check Content Service.
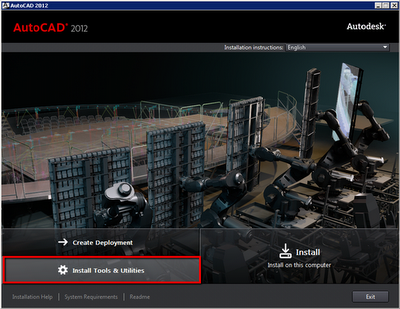
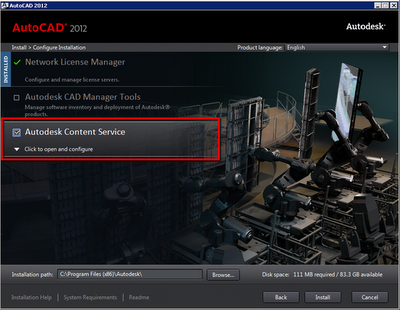
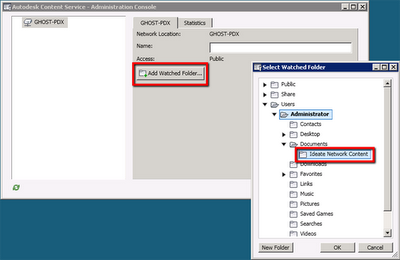
After the Content Service utility has been installed launch the application by clicking the Autodesk Content Service Administration Console icon on the desktop. Once in the Console click Add Watched Folder and browse to the folders you want to add; depending on the size of the folders it could take several minutes to index the contents. Once completed this folder will be “seen” by all other computers with AutoCAD 2012 or with the Content Service installed.
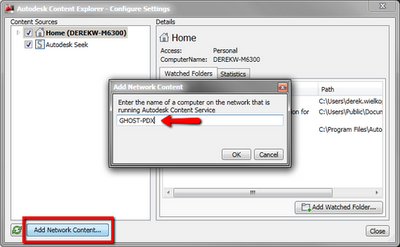
Now on the workstation launch AutoCAD and the Content Explorer in the Plug-ins tab. Click the Configure Settings button in the lower right corner. In Configure Settings click Add Network Content and type the name of the computer or server with the shared content folder and Content Service. Once the entire folder is found it’ll be visible under Content Sources.
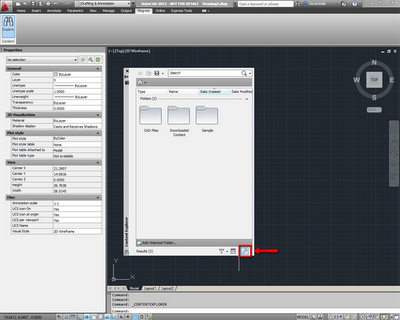
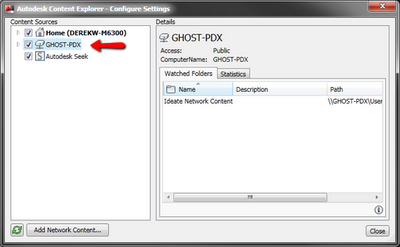
Clicking the Source button on the Content Explorer palette will toggle between the local content, Autodesk Seek, and the network content we just added.
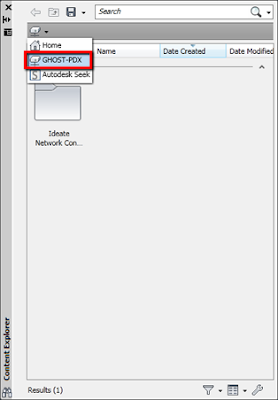
Now you can search local and network content within AutoCAD in a single interface saving time instead of hunting through a myriad of folders in Windows Explorer.
Autodesk Exchange also has a great video describing the same process under the Getting Started Videos and is available here.
I hope you found this helpful, and if you’re interested in more new AutoCAD 2012 features register for my next webinar session.
I also recommend looking at our other Autodesk 2012 What’s New posts, take a look.
 Derek Wielkopolski
Technical Support Manager/Application Specialist
Derek holds a Bachelor of Architecture degree from Roger Williams University, Rhode Island. He is experienced working within the AEC industry from concept design through construction administration for both small and large scale projects. As Ideate’s Support Manager he ensures a timely and quality response to support requests and questions. Follow Derek on Twitter: @dwielk
Get it. Know it. Use it.
